Why Body Butter is a Skin Care Staple

Body Butter is like a thicker, waterless version of lotion that deeply moisturizes the skin and prevents dryness. It also helps improve skin texture and fades the appearance of fine lines and blemishes for a more youthful appearance.

Body Butter

Use a clean scoop or spoon to take a small amount out and massage it onto your skin, concentrating on dry spots such as elbows and knees.

Body butter is a skin care staple because it deeply moisturizes the skin to help keep it supple and healthy. Its emollient ingredients like shea and cocoa butter soothe the skin while helping to prevent dryness. The oil-based formula also helps to seal the moisture in for longer, so it doesn’t evaporate too quickly.

The best time to apply body butter is straight out of the shower when your skin is still slightly damp. Be careful not to overdo it though as too much may cause clogged pores. A little bit goes a long way, so start small and then add more as needed. Also, make sure to focus on driest areas such as elbows, knees, and hands.

Body Butter can be used on its own or in conjunction with a body oil to really lock in the moisture. It can even be used on the face to treat drier areas such as around the mouth or on the eyes.

Its rich, nourishing, and hydrating ingredients can help improve the appearance of age spots and hyperpigmentation. Regular use can also help prevent creases, wrinkles, and dark circles under the eyes. The vitamins and antioxidants found in body butter can also help to protect the skin against environmental pollution.

While it is generally recommended to use a moisturizing oil before applying body butter, there are exceptions to this rule. Body butter can be applied over the body oil if it is made from natural oils that are known to be gentle and hydrating.

A good quality body butter will usually contain skin-friendly, non-comedogenic oils such as shea, jojoba, and sunflower. It should also be free from parabens, phthalates, synthetic dyes, and other harsh additives that can irritate the skin.

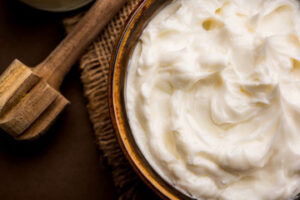
When choosing a body butter, look for one that has no added water so you’ll have the full benefits of the oil-based ingredients. Whipped body butters are particularly beneficial because they can have a soft, fluffy texture that is easier to spread and blend. They can have a light scent and can be made with glycerin, which helps to keep the body butter from collapsing as it’s being spread. Some will also have a stabilizing ingredient such as arrowroot powder to help prevent the butter from breaking down.

Nourishes

Body butter is known to nourish and revitalize the skin. It is rich in vitamins, minerals, antioxidants and other essential fatty acids. This helps to repair dry, damaged, and flaky skin. It also improves skin elasticity and reduces stretch marks. It gives the skin a soft, youthful glow and provides hydration for longer. It can be used on the whole body, including the sensitive areas like hands and feet. The best time to apply body butter is after a shower or bath. This allows the product to fully absorb into the skin before you put on your clothes.

Scoop a small amount of body butter with a clean spoon or your fingers and spread it over your entire body. Be sure to apply it to super dry spots like elbows and heels. Once your body is covered, gently massage the product into your skin using circular motions. Then, let it sit for a few minutes so that the ingredients can fully penetrate into your skin.

It is also important to store your body butter properly. Avoid exposing it to heat sources and sunlight, as this can cause it to melt or lose its texture. It is also recommended to use a clean scoop or spoon, and to tightly seal the container after each use. This will minimize the introduction of contaminants into the product and prolong its shelf life.

There are several different kinds of body butter available on the market. Some are made with shea butter, which is a highly-recognized moisturizing ingredient that can help to repair dry and damaged skin. Cocoa butter is another popular choice, as it can give your skin a soft, smooth, and rejuvenated look.

You can also try a luxurious body butter that is infused with a blend of natural extracts. This can include saffron, jasmine, and lavender. This kind of body butter is known to soothe your skin, reduce blemishes, and give your skin a beautiful, natural glow. This is a great way to pamper yourself, and it will also help your skin look younger and more vibrant!

Prevents Dryness

Whether your skin is normal, dry or oily, the right body butter can make all the difference. Body butter is typically thicker than a lotion and contains a blend of naturally derived butters (like shea, murumuru, mango and cocoa) along with essential oils like coconut oil and rosehip oil. It is rich and nourishing, providing deep hydration for your skin.

It is also a great option for anyone who experiences dryness or itchiness because of a specific skin condition, such as eczema. The hydrating ingredients, along with the fact that it can be applied generously, can provide relief from the symptoms of these conditions. Just make sure to patch test any new products on your skin before use to ensure they don’t aggravate them.

Applying body butter can be done on both wet and dry skin, although it works best when your skin is damp. The moisture from the shower and the warm water can help lock in the body butter, allowing your skin to soak it up quickly. It is also a good idea to apply it on any areas that are especially dry, such as your elbows and knees. These areas tend to lose hydration more quickly because of friction with clothing, shoes and other items that you wear or touch throughout the day.

When you apply body butter, you should wait a couple of minutes before getting dressed or showering so that your skin can absorb the moisturizer. Then, you can reapply it as needed throughout the day.

Aside from using it on your hands, you can also slather a little body butter on your feet before putting on a pair of socks at night. This helps seal in the moisture so your feet can stay hydrated during the night. It is also a great idea to slather on some body butter on your cuticles, as well, to keep them hydrated and prevent dryness.

Hydrates

A body butter is a luxurious concoction of oils, butters and natural extracts that can give your skin the deep hydration it needs to stay healthy and glowing. Unlike lotions and creams, these thick body moisturizers are formulated without water to help your skin feel supple and smooth, while also nourishing it with essential vitamins and minerals.

Because they have a high concentration of hydrating ingredients, body butters are ideal for dry and itchy skin. They can also help reduce the appearance of stretch marks, scars and wrinkles. Using a body butter regularly can also help prevent flaking, redness and inflammation caused by eczema, sunburn or other skin irritations.

While there are a wide range of body butters on the market, not all are created equal. A good body butter should contain a blend of natural and organic ingredients, and will be free of synthetic fragrances and dyes. It should also be free of harmful chemicals and parabens, which are commonly found in many mass-produced body creams. If you are looking for a natural body butter, it’s best to choose one that is made from shea or cocoa butter and contains no added chemicals.

The best time to apply a body butter is right after showering while your skin is still slightly damp. You can use a spatula or your fingers to scoop out a small amount of the butter, and then rub it onto your skin using a circular motion. A little goes a long way, and you can focus on particularly dry areas of your skin like your feet, elbows and knees.

Once you’ve applied your body butter, wait a few minutes for it to soak in, and then rinse it off with warm water. If you have particularly dry skin, you can also apply it before going to bed and then wear cotton socks or gloves overnight. This will help the moisture sink in and keep your skin hydrated throughout the night.

If you’re looking for an even more intense hydration treatment, try applying body butter before and after your workout. This will help lock in the moisture and keep your skin nourished and healthy all day long.

How to Properly Clean a Deck

Deck Cleaning Charleston SC should occur every year to remove built-up dirt and stains. Before beginning, cover nearby plants and greenery with a tarp to prevent cleaning solution spills from damaging your landscaping.

Use a cleaner formulated for composites and follow the dilution instructions. Avoid chlorine bleach, which will damage the wood and kill plant life. Instead, choose a product that contains oxygen bleach that doesn’t harm plants.

During normal use, debris can build up on your deck. This can come from leaves and other plant matter that falls on the deck, food and drink spills, or dirt tracked onto the deck by kids and pets. Debris can also collect in the spaces between the deck boards. If this debris is not removed, it can cause the deck to rot. Fortunately, it is easy to remove debris from your composite deck using a simple soap-and-water solution.

First, clear the deck of any furniture or grills to make it easier and safer for cleaning. Aim to sweep the entire deck area to remove any loose debris. Next, rinse the deck with a hose or pressure washer to loosen and remove any stuck-on dirt or grime. Depending on the type of stain or discoloration you are trying to eliminate, you may need to scrub the deck with a brush. Typically, a medium-stiffness nylon brush is recommended for TimberTech composite materials. After rinsing, you should be able to see a dramatic difference in the appearance of your deck!

If you’re using a store-bought deck cleaner, follow the instructions for application. For a homemade cleaning solution, mix water and white vinegar. Be sure to check that the vinegar is compatible with your deck’s surface material. Always wear rubber gloves when mixing and applying the cleaning solution to protect your skin, eyes and lungs.

After the deck has been cleaned, you can start to see your hard work pay off! Your deck should look much cleaner, with less stains and discoloration. For best results, try to clean your deck at least once per year. If you can do it more often, you’ll be able to enjoy your deck even more and prevent the need for a major cleanup in the future.

After the deck has been cleaned, it is important to take some time and inspect it to be certain that it is safe for use. Look for any tripping hazards, such as nails or screws sticking out of the wood. If there are any issues, you should address them as soon as possible to prevent further damage to the deck.

Stains and Mildew Removal

As the hub of outdoor living, decks host a season’s worth of grilling, dining, and entertaining activities. These events can leave behind greasy food or drink spills, mildew and soot, tree sap, dirt, leaves, and even rusty furniture. These stains and grime can cause your stain to fail and attract mold growth, and they also leave behind unsightly spots on the wood.

You can clean most stains with simple cleaning solutions that you may already have in your home. Liquid dish soap works well for lightly soiled decks, and it’s safe to use on stained wood. Mix a solution of one gallon of water with a quarter cup of liquid dish soap, scrub the deck surface, and rinse thoroughly.

To remove more stubborn stains, you can use an oxygen bleach solution of one cup of oxygen bleach ($9, Target) and one gallon of water. Scrub the area with a brush and let the solution sit for about 15 minutes before scrubbing again and rinsing. The oxygen bleach solution will also kill mold spores and prevent future growth.

Another way to keep your deck free from mold is to sweep and clear away leaves, small twigs and debris regularly, especially in shady areas. This will keep the debris from collecting and moistening on the deck, and it will make it harder for mildew to develop.

A simple solution of one gallon of water and a cup of white distilled vinegar can also be used to clean the deck. Vinegar will remove mildew and algae, and it will also kill mold spores and remove the smell. Then, after you have cleaned the deck with a mild cleaning solution or a deck cleaner, letting it dry in the sun will also help kill any mold or mildew that is still alive and will prevent them from returning.

When you are ready to reapply your stain, be sure to work in a cool or shaded area and avoid direct sunlight as the sun will heat up the stain and increase the drying time. Apply the stain in small sections and then allow it to dry between each application. This will ensure that the stain absorbs evenly and does not leave any unsightly streaks or blotches.

Cleaning the Underlayment

Keeping dirt and debris from under the decking is crucial to a long life. The best way to do this is by sweeping and removing leaves and debris before they’re allowed to settle. You can also use a leaf blower to remove loose debris from hard-to-reach corners and nooks. Once your deck is free of all debris, it’s a good time to determine if it needs to be sealed. To test this, simply sprinkle a small amount of water on the surface of your deck. If the water beads up and spreads around, it’s time to reapply your deck sealer.

Before you start cleaning your deck, make sure to cover any nearby plants and greenery with a tarp to prevent them from getting spattered with cleaner or stain. You’ll also want to move any outdoor furniture and other items off of the deck. Leaving them in the same place for too long can result in uneven fading from sunlight exposure.

A wood deck requires special care to keep it looking its best. For the best results, choose a cleaner that’s safe for your deck’s material. If you prefer, you can also make your own home-made cleaning solution from white vinegar and water. However, make sure you only use it on a dilution ratio of 1 part vinegar to 4 parts water. If it’s used undiluted, vinegar can leach the color out of your decking.

Once you have your cleaner and deck cleaning tools ready, it’s time to start the process of restoring your deck to its former glory. Start by sweeping the deck thoroughly, paying particular attention to the nooks and crannies where dirt and dust often collect. This will help to ensure that your cleaner gets in every nook and cranny to effectively clean the deck.

If your deck is made of composite materials, work in small sections so that the cleaning product won’t dry before you’re able to scrub it. Using a brush specifically designed for your deck’s material (one with medium stiffness for TimberTech, for example), apply the cleaner and rub it in with the grain of the boards. Be sure to scrub in between the boards as well.

Oiling

Regular oiling of timber decks is a great way to protect the surface and help it retain its colour. When the weather is dry and you have swept away all the debris, apply your chosen decking oil. As a rule, it is best to use oil that is safe for your particular type of timber (check with your supplier). It is important that the deck is clean and dry before applying the first coat of decking oil. This will help to open up the pores of the wood so it can absorb the oil, and it also helps prevent moisture trapping under the oil which could eventually lead to rot.

During the cleaning process, a scrubbing brush will be necessary to scrub the surface of the deck. It is important to use a brush that is specifically designed for decking, or one with soft bristles to avoid damaging the wood. If any areas of the decking are particularly dirty, try using a small amount of bleach mixed with water to create a more powerful cleaning solution. Once you have scrubbed the deck, rinse it with a hose or pressure washer to remove any remaining grime. You should then leave the deck to fully dry before continuing with the oiling.

When you are ready to start applying the decking oil, it is important to work in a well ventilated area, and to wear protective gloves when mixing and using the cleaner. Some cleaners and boost agents can cause skin irritation, and the combination of these chemicals with bleach can also produce toxic chloramine gas, so it is essential to take care to minimise exposure.

If you are using a natural wood stain, it is best to patch-test your chosen product on a small part of the deck before starting on the whole surface. This will help you determine how much oil needs to be applied and ensure that the deck will look consistent when finished.

If you are using a commercially available decking oil, follow the manufacturer’s instructions for dilution and application. It is also advisable to apply a second and even third coat of oil, allowing the first to dry between each application. If you are using a pre-mixed product, the colour may vary slightly between batches. Always apply a thin coat, as too much oil can gum up on the surface and make it hard to wipe off.

The Differences Between Sod and Turf

Sod And Turf Harrisburg PA are both grass coverings that can be used to replace bare lawn areas, prevent soil erosion or enhance the beauty of your property. The differences are in how they are grown and installed.

Sod is ready to use right away, whereas turf requires some time to grow and establish roots. Both offer different benefits depending on your needs and the climate in your area.

Sod is a beautiful addition to any landscape. Not only does it add instant curb appeal, but it also saves time because there is no need to wait for grass seed to grow. There are many different kinds of sod, using both warm and cool season grasses. There are even sod varieties designed for specific light conditions, such as full sun or shade.

Sod has a very long history. It was first used in Europe to establish pastures for livestock, but later it became popular on large European estates to enhance the aesthetics of their grounds.

Originally, sod was made up of strips of low-growing grasses that were placed together with the adhering soil. These were the earliest turfs maintained for recreation, but they weren’t as sophisticated as modern sod. By the 1100s, areas of lawn were being grazed and cut with scythes, and turf was a common fixture in some parks.

It was around this time that settlers brought sod with them to their new homes. It was also the time that the first sod cutter was invented, which allowed for much more efficient production of sod.

Once the technology to produce sod was perfected, it became a very popular way to create beautiful lawns. It wasn’t just for wealthy estates, though; the average person could afford to have a lush green yard, too.

As sod became more available, people began to use it for sports fields, golf courses and other recreational facilities. The turf industry exploded, and sod was soon widely used throughout the country.

The word sod is often confused with turf, but the two words have very different meanings. Sod refers to both the soil base and the established grass, while turf is a term generally used in America and Australia, and limited primarily to agricultural uses.

Today, sod is typically grown on a sod farm and then shipped to the home or commercial site. The sod is then cut, rolled and stacked to be ready for installation. Sod is more convenient than laying grass seed because it doesn’t take as long to establish and there is no need for watering or weed control.

Choosing Sod

A beautiful garden adds to the value of your home. It can also be a source of pleasure and relaxation. There are two methods for achieving a lush lawn: sowing grass seeds or laying sod. While both have their merits, sod provides a quicker, more aesthetically pleasing option for some homeowners. Choosing the right sod is critical to success, however. Different varieties of grass have varying water and maintenance requirements, and some can be more susceptible to diseases in your area. Evaluate how much time you are willing to devote to maintenance and choose a sod type that fits those needs.

The sod installation process is easier if the soil has been prepared prior to starting. Soil should be loose, and a good aerator can help reduce hardpan and prevent crusting. It is also recommended that the top 1/2 inch of the soil be kept moist until the sod roots develop, which typically takes 14 days. Sod can be installed at any point in the year, though spring and fall are optimal times for sod establishment.

Once laid, sod is usually ready for normal use within a few weeks of installation once the roots are firmly established. However, it is important to avoid heavy foot traffic on the sod until this time. It is also crucial to protect the sod from the sun, especially in the first few weeks after installation.

Some sod types are able to withstand more sunlight than others, so the amount of sunlight your lawn gets should also influence your sod selection. For example, Bermuda is great for full-sun lawns, while tall fescue is best for shaded areas. Also, consider how much foot traffic your yard will receive and choose a sod type that can handle this load.

Erosion Control: Sod is a preferred method for erosion control, particularly on slopes or in areas that are prone to runoff. Its dense growth helps to control soil movement and prevent weeds, while its root system stabilizes the soil to help prevent mud or dust. Weed Suppression: Sod is an effective weed suppressant and can be used in areas where weeds are difficult to grow through seed.

Installation

Sod provides instant curb appeal for your property and is used in a variety of residential and commercial applications. It is grown on a farm and harvested in small squares or rectangular slabs, or in large 4-foot-wide rolls. Sod can be laid spring through fall and during winter in mild climates. It offers an advantage over seeding because it avoids the problem of weeds sprouting in bare soil and can be laid year-round.

The first step is to prepare the soil. Soil should be tested for pH, nutrients and aeration. The results will help you determine if you need to amend the soil before installing sod. You can purchase soil testing kits from garden centers or your local extension office. The test results will tell you precisely what to add and in what quantity.

Soil that is not amended properly can prevent the sod roots from establishing well and can cause problems when mowing or watering. Before sod is installed, existing grass and weeds must be killed with a nonselective herbicide such as Round-up. It is also a good idea to till the soil to break up any clay-like pockets and to ensure that nutrients are distributed evenly.

Once the sod is delivered it must be laid within a few hours after it’s cut and transported. This allows the sod to bind to the soil and become a permanent part of your yard.

When you start laying the sod, work with whole pieces and try to minimize cutting. Begin the first row at a straight edge, such as the corner of your patio, driveway or flower bed. Then, lay the sod in a brick wall pattern, staggering the seams as you go. If you have to cut a piece, make sure it is trimmed flush with the previous row to avoid having an unsightly seam.

During the first week of sod growth, it’s essential to water the area daily to establish the root system. The soil should be kept moist, but not wet or muddy, to minimize disease and fungal problems. After that, water less frequently, but more deeply to encourage deep rooting. Ideally, the sod should be watered in the morning to minimize the risk of fungal problems from exposure to the sun’s heat.

Maintenance

Sod provides a quick, weed free alternative to planting grass seed and is ideal for repairing damaged areas of your lawn or preventing soil erosion. It is also used for professional sports turf and golf courses. Sod requires some maintenance, however. It is recommended to fertilize new sod 3-4 times during the growing season using a slow-release form of Nitrogen.

A good time to plant sod is in the fall or spring. Cool-season sod species such as tall fescue and Kentucky bluegrass will thrive best when planted during these seasons. Warm-season sods such as zoysia, tall fescue and bermuda can be installed in the summer; but it’s important to ensure that your sod receives enough water for roots to develop during this hot period.

When you begin to water your sod, it is vital that you water for at least a half hour each time to prevent the roots from drying out. Depending on the weather and your climate, it may be necessary to water more often to keep the sod and soil properly moist. When you are watering your sod, it is recommended that you soak the ground instead of spraying. This will help to avoid fungus and encourage the sod’s root development.

Watering should be done in the morning or night, as this will minimize evaporation and increase the amount of moisture that penetrates to the roots. A paling color on the sod can indicate that it isn’t obtaining sufficient moisture and needs to be watered thoroughly until the color returns to its normal shade.

Sod that isn’t receiving enough water will turn brown and can go dormant in the summer if not rehydrated. This is due to lack of oxygen in the roots as a result of not having enough moisture.

It’s also very important to keep pets, children and anyone else off of the sod until it has fully taken root. This will allow the sod to establish itself and prevent any damage from being caused by foot traffic. Walking on sod too early can cause it to become unrooted or even die.

What Is Payroll Administration?

Payroll administration involves a wide range of processes, including the issuing of paychecks and managing direct deposits. It also includes calculating taxes and deductions, keeping an organized data record, responding to inquiries, and resolving issues.

Payroll Administration

A payroll administrator must be familiar with local governing laws to ensure compliance and avoid penalties. They must also be able to work closely with the human resources and IT departments. Visit https://www.jgregorypeo.com to learn.

Staff administration in payroll administration involves a number of tasks that vary depending on the size and type of business. A small company may only need a single administrator to handle all the payroll processing, while larger organizations need a team of professionals to work on taxation, accounting, and software management. These professionals often work closely with other departments, such as human resources and information technology, to ensure all aspects of the payroll are accurate. They also need to keep abreast of changes in labor laws and regulations.

A payroll administrator will typically need to process a large volume of transactions each month. This includes issuing and distributing paychecks, recording hours worked by employees, and calculating taxes. They will also need to record all employee deductions, such as 401k contributions and insurance-related reimbursements. Additionally, they will need to maintain detailed records of all employee pay, including their wages, taxes withheld, and unused vacation and sick days.

The payroll administrator will need to have a good understanding of the local and federal rules that apply to wage garnishments, benefit deductions, and other withholdings. In addition, they will need to have experience with timekeeping systems and a strong knowledge of accounting fundamentals. Ideally, a payroll manager will have an associate degree or higher and be certified as an accounting professional.

Whether your organization is small or large, it’s important to have accurate and timely payroll processes in place. This will ensure that employees receive their wages on time and that your company is compliant with tax regulations. In addition, mistakes in payroll can cost your company significant fines. It’s therefore essential to use a reliable payroll service provider.

A payroll administration job is perfect for people who love working with numbers and enjoy working in a busy environment. It can be a stressful job, especially in a large organization with many employees, but it can also be rewarding. This is because it offers a great opportunity to influence the key business processes of a company.

Unlike some other types of finance jobs, payroll administration requires numeracy skills and the ability to meet tight deadlines. This is because payrolls are complex and often require multiple levels of approval before they’re distributed.

Payroll calculation

Payroll calculation is a crucial aspect of payroll administration. It includes calculating and deducting payroll taxes, preparing payroll reports, and issuing paychecks to employees. The tasks involved in this process vary depending on the unique needs of each business. Often, payroll services outsource these functions to reduce the risk of errors and miscalculations. This can help businesses save time and money, while reducing the burden on employees and managers.

Ideally, companies should use a software program for payroll calculation. This will allow them to run payroll more efficiently and reduce the chances of errors. Moreover, it will enable them to stay up-to-date with changing tax laws and regulations. It will also help them avoid penalties and fines for non-compliance. In addition, it will allow them to track employee attendance, and it will be easier to spot discrepancies.

The payroll calculation process begins with determining gross wages and then subtracting deductions to arrive at net pay. Then, the payroll tax deductions and other withholdings must be calculated. Lastly, the payroll report must be submitted to the relevant government agencies. The final step is to issue the employees’ pay stubs, which include an itemized list of their gross wages, deductions and net payments. Generally, the stubs must match the amounts that are recorded in the company’s accounting system.

During the payroll calculation process, it is essential to ensure that all deductions are accurate and that the total amount paid matches the bank statement and employee pay stubs. This will prevent any discrepancies in the future, as well as protect the company from wage violation complaints. It is also advisable to keep all payroll documents in a secure location, and to store them for a certain period of time.

Managing payroll can be difficult, especially for small businesses that lack a dedicated HR team. Outsourcing this function is a good option for businesses that need to focus on other operations. However, it is still important to understand the fundamentals of payroll calculations. Knowing these simple calculations can make it easier for you to determine an employee’s paycheck and spot any errors before they become problematic.

Payroll processing

Payroll processing is a complicated and time-consuming process that includes inputting employee information, tracking hours, applying deductions and delivering the final cheque. It can be done manually, through an outsourcing company or using payroll software. This process can take up to a month to complete and is one of the most important aspects of running a business. It is also a legal obligation, and businesses must ensure that they are complying with labor laws.

There are a number of steps that need to be taken before the actual payroll processing can start, including making decisions about what payroll management methods are best for the company and registering with local authorities. Businesses should also keep detailed records of all payroll transactions, such as wages paid and deductions made. This will help them maintain financial accuracy and compliance with tax laws. It will also make financial analysis, reporting and decision-making much easier.

A good payroll processing system must be able to handle complex calculations and provide accurate paychecks. It should be able to take into account different pay rates, overtime and bonuses. It should also be able to track and calculate federal, state and local taxes. It should also be able to record and report employee leave, such as vacation and sick days.

It is also important to have a reliable system for tracking employee hours, especially for hourly employees. This will allow employees to easily check the hours they have worked and make sure that the correct amount of money has been paid to them. It is also important to remember that federal tax deductions and social security payments may be withheld from the employee’s paycheck.

Whether you’re managing your own payroll or outsourcing it, it is important to have the right tools and resources to make it work. The most important aspect is ensuring that the payroll is processed correctly and on time. This means that you must have a clear understanding of all the rules and regulations associated with your industry and be able to follow them. You should also have the ability to quickly and accurately identify errors in your system and address them before they become a major problem.

Payroll reporting

Payroll reporting is an important component of payroll administration. It allows employers to record, verify and analyze the company’s tax responsibilities and ensure compliance with federal and state laws. It also helps employees plan their finances, and it’s helpful during audits or if the employer is ever contacted by government agencies. Payroll reporting can be done through a variety of software programs, including off-the-shelf and custom-built payroll software applications.

A payroll report is a document that summarizes the payroll activity for an employee over a certain time period. This includes gross and net pay, taxes withheld, deductions and other information. This report is used internally to determine an employee’s wage and benefit expenses, and it can help businesses budget their employee costs.

Preparing payroll is a complex and critical process that requires the expertise of qualified payroll administrators. It involves calculating the amount owed to each employee, determining the taxes to be withheld and distributing the paychecks. It also includes preparing year-end tax reports and managing garnishments, direct deposit accounts, and ACH reversals. It is essential that these responsibilities are completed accurately and timely.

Depending on the needs of an organization, payroll reporting can be conducted on a weekly or monthly basis. For regulatory purposes, however, the reports must be filed by a specified date each month or year. In addition to submitting these reports, payroll administrators can also perform general HR responsibilities, such as managing employee relations and designing benefits.

The best way to manage payroll is by using automated software that eliminates the need for manual calculations. It can reduce the risk of errors and improve the accuracy of your data. It can also increase efficiency and productivity. However, the most important benefit of payroll software is that it can save you money. Whether you choose to use an automated system or a traditional time and attendance solution, it’s crucial that you invest in the right technology for your business.

While the job of a payroll administrator is often viewed as a simple and straightforward one, it is actually a complicated process that involves many moving parts. To be successful, you must be detail-oriented and able to work in a fast-paced environment. It’s also important to keep up with the latest workforce trends and regulations. Only then can you deliver the accurate, consistent service your business depends on.

Why You Should Consider Installing a French Drain

French Drain Baltimore collects surface and groundwater and redirects it, using gravity, to another area on your property. It will help you maintain a healthy soil moisture level and avoid water damage to your home or garden.

French Drain

First, decide where you want to redirect the water. Then, dig a trench. Line it with fabric to prevent soil from clogging the drainage pipe.

A French Drain is a great system to keep water from pooling around your home and prevent soil erosion. However, like many other systems used to keep your house running smoothly, the French Drain can experience problems if it is not properly maintained.

One of the most common issues that a French Drain can face is clogs. Because the drain is buried beneath the ground, it can easily collect sediment and block the flow of water. If the clog is not addressed in time, it can lead to serious water damage and even basement leaks.

In order to avoid this problem, it is important to regularly inspect the drain and remove any clogs as they occur. This can be done by removing some of the gravel covering the drain to get a better view of the area. Additionally, a regular cleaning with a pressure washer is recommended as it can be very effective at breaking up clogs without damaging the pipe. The process involves inserting the nozzle of the pressure washer into the drain and blasting water into it, causing the clog to break apart and clear away.

Another issue that can occur is when the French Drain is not positioned correctly. If the drain is not positioned close enough to the home, it can cause water to seep into the basement or crawl space and promote mold growth. It is also important to ensure that the slope of the drain is correct, so that water flows properly away from the home and not toward it.

Erosion can also occur if the French Drain is not properly positioned or has been damaged by heavy rains or stormwater. This can lead to the drainage system collapsing, which can cause damage to the yard and foundation of the home.

If you are experiencing any of the above drainage problems, it is important to contact a professional landscaping specialist. They can help you determine the source of the problem and recommend the best solutions. Depending on the severity of the issue, they may repair the drain pipe, trench or clean out the debris that is causing a blockage.

Soil Erosion

A French Drain is designed to prevent soil erosion caused by drainage issues. Without a proper drainage system, water can pool in your yard or near a foundation and cause damage to the house’s foundation. A French Drain will prevent this by transferring the excess water to another area.

Soil erosion is not only dangerous for your home, but it can also be a huge nuisance for your neighbors. It can destroy landscaping, degrade the lawn, and even lead to mud in the basement. A properly installed French Drain will help reduce soil erosion and protect the landscaping around your property, keeping it looking beautiful.

One of the main problems with soil erosion is that it’s difficult to stop once it starts. It’s not uncommon for a small amount of erosion to turn into a large amount over time. A French Drain can prevent this by providing a solution to the drainage issue.

It can do this by replacing the soil with gravel, which makes it much easier for water to flow down into the pipe. Typically, gravel has larger gaps than soil, which helps with the flow of water. For this reason, you’ll need more gravel than soil for every 10 feet of drainage. This can add up quickly, making it a costly job for homeowners to install themselves.

For many homeowners, hiring a professional is the best option. Not only do they have the experience and equipment to efficiently dig a trench, but they can also handle the city requirements for permits. Plus, they can mark any underground lines before starting work. This will save you money and time in the long run.

In addition, the professionals can make sure your French Drain is located in the right place to prevent water from getting where it’s not supposed to go. This includes avoiding areas around building foundations, utility lines, tree roots, and big structures.

Finally, the experts can ensure your French Drain is constructed to last by using quality materials. This includes the drain pipe itself, which is usually made from PVC. The pipe is also wrapped in a permeable fabric to keep dirt and debris from clogging the holes in the pipe. This will make your French Drain last longer and reduce the cost of maintenance.

Increased Value of Your Home

For homeowners that struggle with damp basements, flooded crawl spaces or swampy yards, a French Drain system is an excellent solution. These underground drainage systems are simple in design and work by rerouting water away from problem areas, says Gene Caballero, owner of Your Green Pal, a site that connects homeowners with lawn service professionals. “Essentially, the system works like a gutter underground,” Caballero said. “Water flows into the trench filled with gravel, through the gravel and into the perforated pipe that carries the water away.”

Because the system redirects water, soil erosion is reduced. Over time, this can save home owners thousands of dollars in foundation repairs and replacements. In addition, it’s important to note that the French drain can also reduce standing water on your property. This will help control mosquito breeding and prevent other pests from settling in the area.

French drains are very effective at relocating water during heavy rain, but they’re only a good investment for properties that are adequately drained to begin with. If you live in a flood zone or have clay soil, a French drain won’t help. However, if you’re experiencing issues with a wet basement or yard, it may be worth the investment to install a French Drain.

Once you have a French Drain in place, it’s essential to properly maintain the system to avoid any future drainage problems or water damage. This includes regular inspections and cleaning out clogs as needed. In addition, it’s important to have your French Drain installed by a professional to ensure that the system is functioning correctly and preventing water damage.

Although many people think that French Drains are expensive, it’s actually less than other waterproofing solutions. For instance, a traditional sump pump, soil gradation, gutter and leader installation and a dehumidifier inside will cost under $1,750 total, and will do a much better job of keeping your basement and crawl space dry. Ultimately, these solutions will not only reduce your risk of structural damage, but will also increase the value of your home. Contact us today to request a quote.

Safety

French drains prevent hydrostatic pressure from building up in the soil around a foundation, which can otherwise cause bowing or cracking of the foundation walls. Having a French drain allows you to avoid the cost of expensive structural repairs, as well as maintaining the aesthetic of your yard and property.

A French drain redirects subsoil and surface water away from your home by creating a path for them to follow. This can help to reduce puddles and water pools on the surface of your yard and may also be helpful in keeping plants healthy. It can also prevent dampness within the structure of a heritage home, which can cause plaster and stonework to crumble.

Typically, a French drain is placed in a trench that is dug out at least a meter from the foundation of your home. This is important, as it ensures that the drain will not be in contact with any below ground structures, such as plumbing or electrical inputs or your home’s footing.

The drain can be fitted with a perforated pipe that is backfilled with porous material to prevent it from becoming clogged by debris and soil particles. The drain can also be fitted with more than one pipe, which can provide redundancy in case one is blocked or becomes overfilled due to a clog.

When installing your drain, you’ll need to think about how it will be incorporated into the landscaping of your yard. You’ll want to plant vegetation that can withstand wet soil conditions, such as wildflowers or perennials, or ornamental grasses. These plants can add a pop of color and attract pollinators to your garden, as well as helping to control erosion and retain moisture.

It’s important to note that if you’re planning on using a French drain, you may need a permit. Be sure to check with your local building authorities for regulations on constructing drainage systems, as they can vary greatly.

To maintain your French drain, it’s a good idea to have a professional inspect it regularly for any clogs. If a clog does occur, you can use a drain snake to break up the blockage. This tool consists of a long steel tube with a corkscrew-like coil at the end that can be turned by hand to clear out a clogged line. It’s a good idea to wear leather gloves and eye protection when working with this tool.

What Factors Affect the Cost of Tree Removal?

A tree that is prone to diseases and pests, dropping debris, or growing near structures or power lines is often worth removing. To save money, combine Tree Removal Baltimore with stump grinding and mulching.

The location of a tree can increase the cost as it makes it more difficult for professionals to access. It can also require specialized equipment like cranes to remove it.

Health of the Tree

tree service

Trees are complex organisms with lots of different things going on inside them from metabolism to seasonal lifecycle changes to repair and growth. Unfortunately, that complexity makes them susceptible to damage or illness that can turn an attractive yard feature into a costly eyesore on your property. If you’re noticing that your trees seem to be in poor health it’s time to call in the professionals and get them looked at by a certified arborist.

A deteriorating tree may need to be removed before it falls down and causes damages. During a health assessment the arborist will examine the roots, trunk and crown for signs of structural problems. This includes rot and decay, large cavities in the trunk, leaning or unstable branches and other issues that could lead to the failure of the tree. In addition to a general visual inspection, the arborist will also take into account any environmental stressors like soil compaction, recent excavations or excessive watering that could be contributing to the deterioration of the tree.

The type of tree will also play a role in the cost to remove it. For example, pine and maple trees tend to grow taller than oaks which means that they will be more expensive to remove.

In addition, the type of stump that needs to be removed will also affect the price. For instance, a stump grinder is much faster and more affordable to use than burning or chemical treatments which can be slow and messy.

Lastly, the proximity of the tree to buildings, power lines or other structures will impact the price as well. It can be very dangerous to work around these types of objects and extra safety precautions will need to be taken which add to the overall cost of the project.

By taking the time to understand all of the elements that go into pricing for a tree removal project you’ll be able to save money without sacrificing quality or safety. Be sure to keep an eye out for our upcoming blog post where we’ll cover more tips and tricks for saving on your next tree removal!

Size of the Tree

A large tree is more difficult to remove than a small one, so the size of the tree plays a major role in how much it will cost. However, it’s not just the height of the tree that counts but also its trunk diameter. For example, a tall tree with a narrow trunk will be more expensive than a shorter tree with a thick trunk.

In addition to the size of the tree, its location will also play a role in the price. If the tree is located near power lines or other structures, it may require extra care and precision to remove, which will increase the price. Similarly, trees that are hard to reach will also increase the price because they will take more time and effort to access.

If the tree has a lot of roots that need to be removed, it will also add to the price. This is because the root system can damage foundations and other underground features if not removed properly. Likewise, trees with a lot of limbs can also add to the price because they will be more difficult to cut and haul away.

Another factor that can affect the price is whether the tree needs to be moved or transplanted. This can be a complicated process that requires specialized equipment and training.

The final factor that will influence the tree removal cost is the amount of time it will take to complete the project. While some trees may only take an afternoon to remove, larger ones can easily take days–or even weeks–to cut down. In addition, safety precautions must be taken when working around buildings or power lines, which can prolong the project and make it more costly.

It’s important to consider all these factors when estimating the cost of tree removal. By taking the time to understand how each factor influences the price, you can ensure that you’re getting the most accurate and competitive quote possible. By making informed decisions, you can save money and get the job done quickly and safely.

Location of the Tree

Trees are a beautiful and integral part of our natural environment, but they can be dangerous if they’re diseased or in an unsafe position. That’s why it’s important to get them removed by professionals who know how to do it safely and effectively. However, there are a number of factors that go into the price of this service, including the size and location of the tree, and what additional services may be needed.

Generally speaking, the larger and more complex a tree is, the more expensive it will be to remove. This is because it will require more manpower and equipment to cut down and haul away, as well as a higher degree of skill to ensure the job is done correctly. Additionally, trees located near buildings or power lines will often cost more to remove because of the added safety precautions that will need to be taken.

The location of the tree can also play a significant role in the price of the removal. If the tree is in a hard-to-reach area or is located close to structures, power lines, or other obstacles, it will be more difficult to cut down and remove, which will increase the overall price. Additionally, if the tree is located in an area with limited space, it will be more difficult to maneuver the machinery used for cutting and removal, which can also add to the overall cost.

While oak trees are one of the most common types of trees to be planted on a property, they can also be some of the most expensive to remove due to their height and extensive root systems. On average, it will cost around $1,100 to remove an oak tree.

Depending on the type of tree being removed, other fees can be added to the base cost, such as disposal or stump grinding. These extra costs will need to be factored into the overall cost of the tree removal, so it’s a good idea to ask about them before hiring anyone to do the work. It’s also a good idea to shop around for quotes from different companies to compare prices and services.

Emergency Tree Removal

When you’re in need of emergency tree removal, the cost can be more than twice as much as a standard removal. This is because emergency tree removals often require special equipment and specialized techniques. Additionally, these types of jobs can be more complicated and dangerous. In addition, the location of the tree can also add to the cost. If the tree is close to buildings or power lines, it may be more difficult to remove without causing damage. Moreover, trees that are located in hard-to-reach areas or those with heavy branches hanging over structures can be more challenging to remove and may require extra labor.

Another factor that can affect the price of emergency tree removal is whether or not the company has the necessary experience and equipment to tackle the job. The type of tree can also play a role here, as some trees are easier to remove than others. For example, pine or oak trees have stronger roots and are more challenging to remove than other types of trees.

The health of the tree can also impact the cost of a removal, especially if it is in poor condition. This is because a diseased or dying tree can be more brittle and prone to breakage. Therefore, it requires more care and precaution when removing them. In addition, a diseased or dead tree can spread diseases to surrounding trees and plants, which could lead to further costs.

In some cases, an arborist may need to hire a crane to remove the tree. This can increase the cost of the removal significantly, and it can be very expensive, depending on how high the tree is. In addition, if the tree is in a hazardous location, such as near a building or power lines, it will be more difficult to remove and will likely require additional safety precautions.

Emergency tree removal services can be expensive, but they’re crucial for property owners. By recognizing warning signs and acting quickly, you can prevent potential hazards from arising, improve the beauty of your landscape, and enhance your home’s value and curb appeal.